Setting up an Anaconda environment for a class
Setting up Python
In many of my classes, we use Python Jupyter notebooks for calculations, and one of the easiest ways to get the software for these notebooks is to use Anaconda.
You should have downloaded and installed the Anaconda Python distribution already (you may use a different means of installing Python if you prefer, but I will not be able to provide support). We need to get Anaconda ready to do science.

- Start Anaconda Navigator.
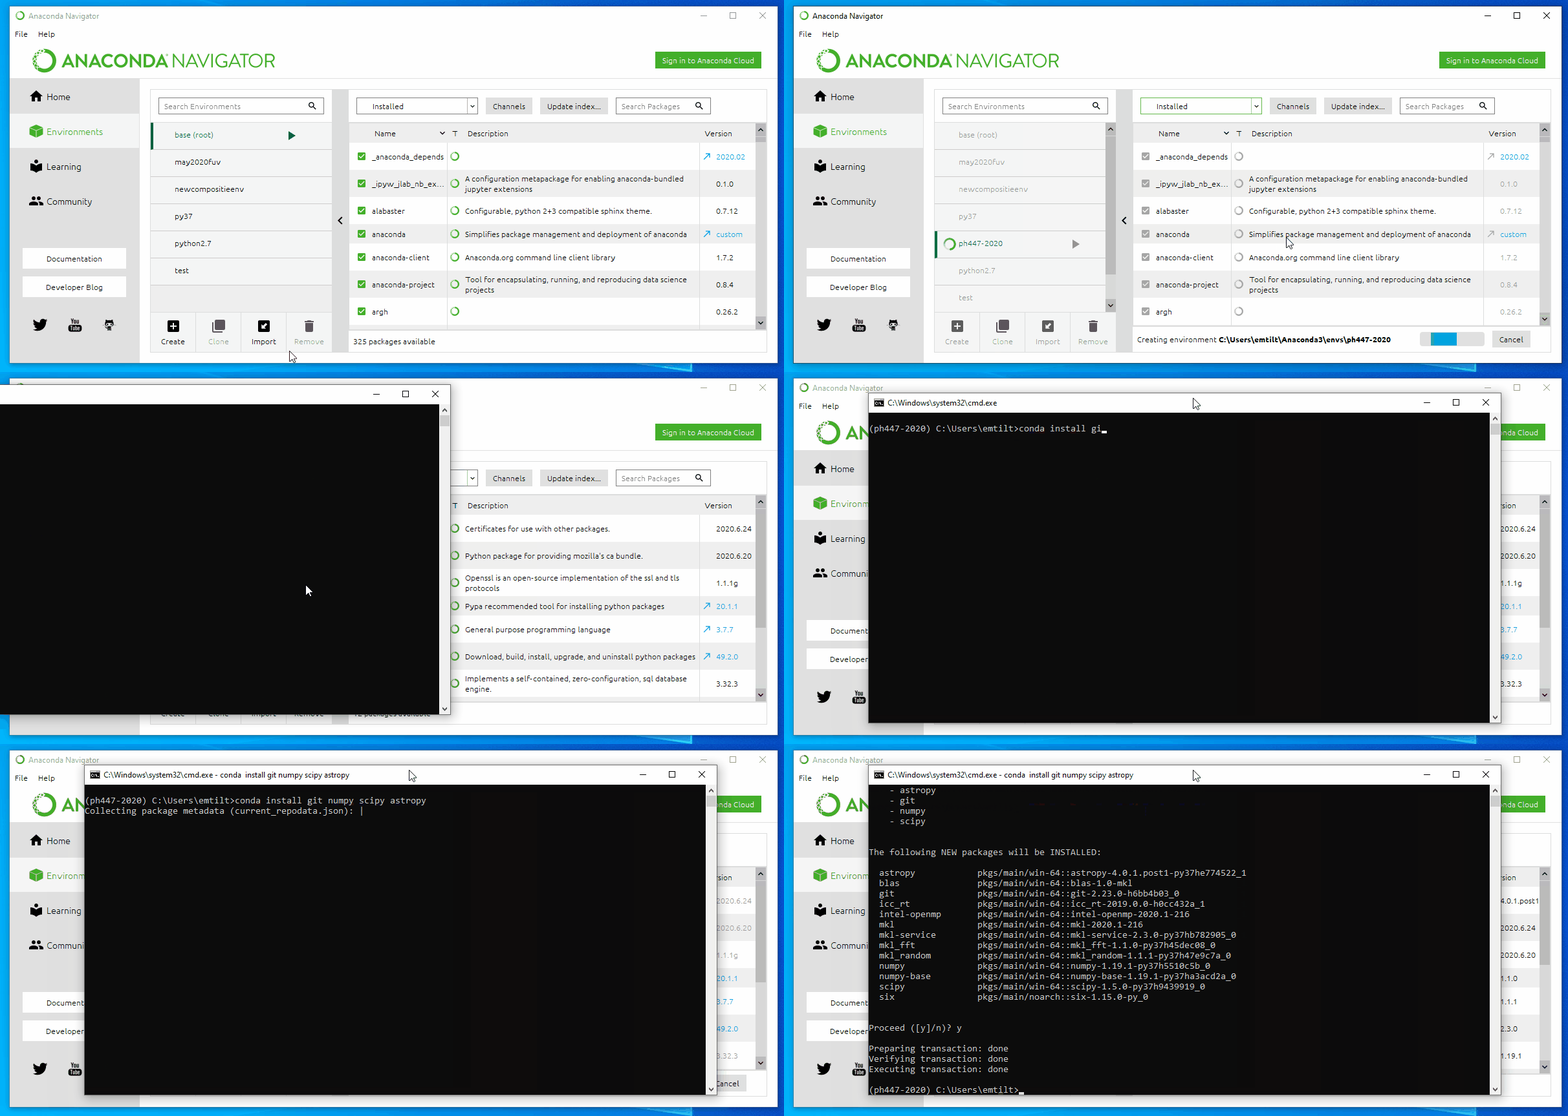
- Let’s create an “environment” to use for our class. An environment is an isolated installation of Python, where you can install additional software that you need for a project. You can make multiple environments, and anything you install in one environment won’t affect the other environments at all. Environments are nice, because you might need different software integrated into your Python software for different projects, so it is a good idea to use different environments for different types of projects. In this case, we’re going to make an environment for everything that we do in one particular course.
- Go to the “Environments” tab in Navigator.
- Click the “Create” button to create a Python 3.7 (or greater) environment in which you’ll do this course’s work. Name it something clear (I chose “ph447-2020” in my video).
- Wait until the environment is fully created, which may take several minutes.
- Now we need to install helpful Python packages. Packages are just pre-made Python code that you can “import” into the code you write so that you don’t have to start from scratch. For example, we’ll install
numpy(which helps with matrix and array math),scipy(which has various scientific tools), andmatplotlib(which helps us make graphs).- Click on the small arrow next the the new environment’s name.
- Click “Open Terminal.”
- In the terminal, type
conda install numpy scipy matplotlib. These are just three common packages – you can add others if you want at any time. (Note that I installed slightly different, more specialized packages in the video above, which you probably don’t need.) - Follow the prompts, typing a
yto confirm that you want to proceed when prompted. This will install several common packages of Python code, and you can use this approach to install others in the future.
- Again on the “Home” tab of the Navigator, there should be a button to “Install” Jupyter Notebook. Do so. It may take several minutes.
Pay attention to this next part! It is important!
Whenever you work on Python code for this class, you should do so with this environment selected. That is, everytime that you open the Anaconda Navigator to work on this class, you should use the pulldown menu to select this environment, and wait for Anaconda to switch to that environment. Only then should you begin working on your Python stuff. This will ensure that you continue to have access to the packages you need.
To edit a Jupyter notebook, select the environment, then click the Jupyter notebook button. That will open your web browser to a page that lets you navigate to and open python files, or to create a new notebook.
